Overview
This page will guide you to add WebDAV as your backup location in Softaculous.
Note : Backup on WebDAV feature has been added since Softaculous version 5.5.4.
The following guide will show you how to add WebDAV backup location in Softaculous.
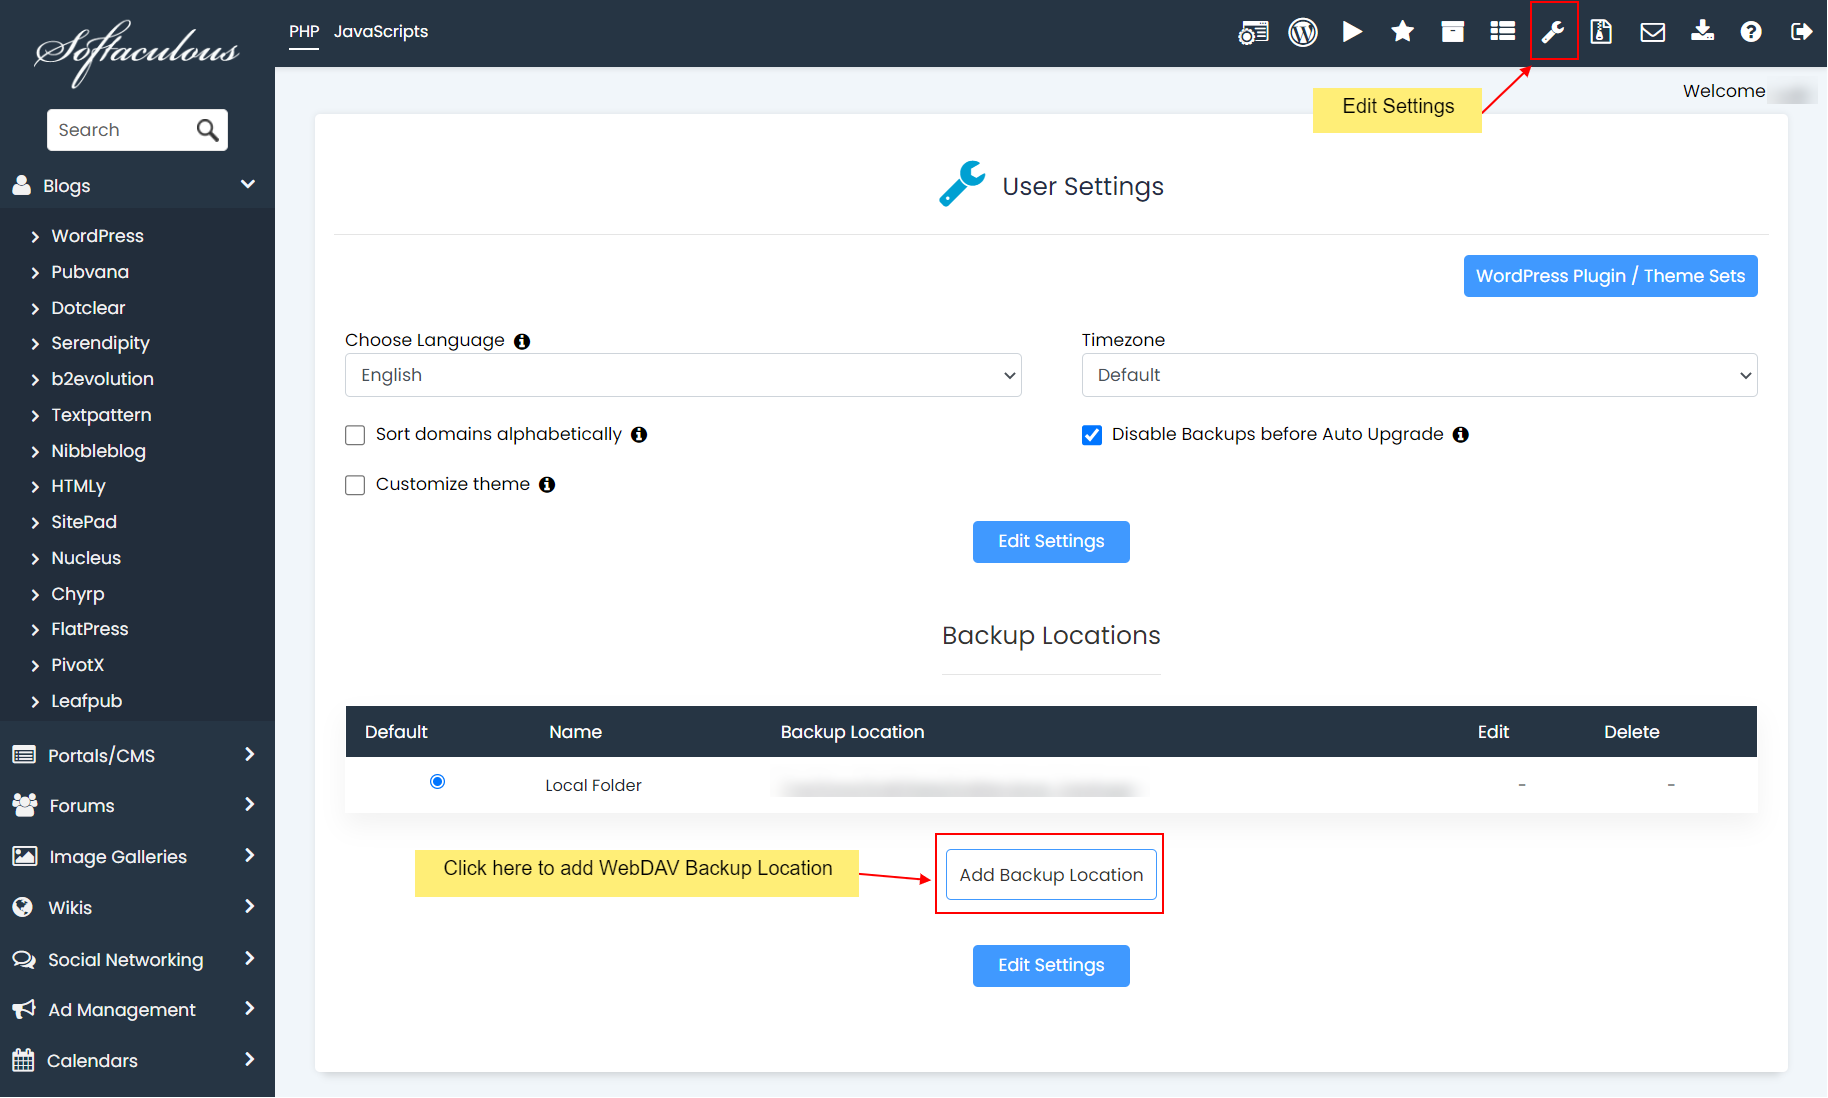
1) Go to Softaculous Enduser -> Edit Settings -> Click on Add Backup Location.
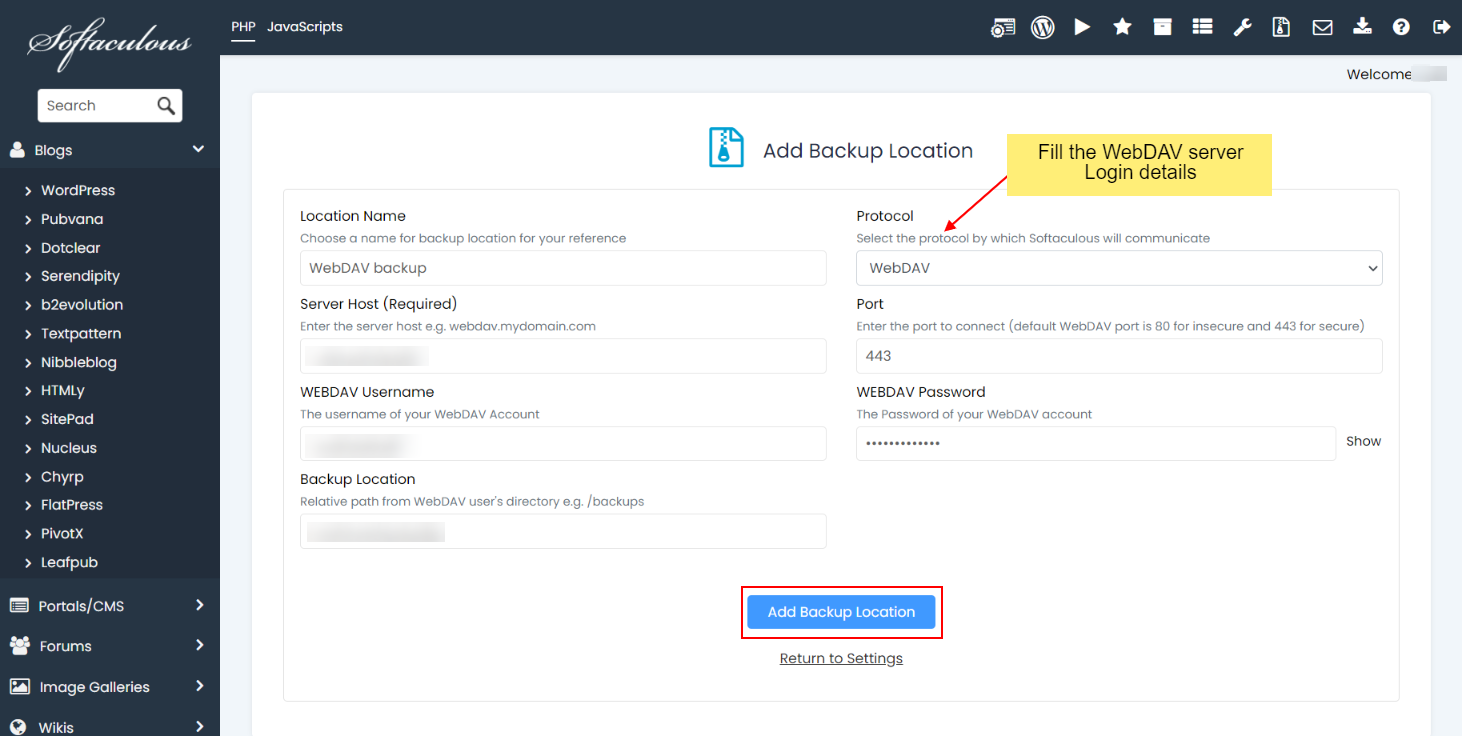
2) Choose Location Name for your reference.
3) Select Protocol as WebDAV from the dropdown.
4) Enter your WebDAV server hostname or domain or IP in the Server Host field.
5) Enter the Port to connect your WebDAV server. Default port for secure connection is 443 and insecure connection is 80.
6) Enter your WebDAV Username which should be used to authenticate while connecting to your WebDAV server.
7) Enter your WebDAV Password which should be used to authenticate while connecting to your WebDAV server.
8) Backup Location : Enter the directory in which Softaculous should create the backups. E.g. /backups
9) Click on Add Backup Location button to add the location in Softaculous.
10) That’s it! Once the backup location is added you can choose to backup your installation on that location from the Backup page.
