Overview
This guide will help you how to enable Automated Backups for your installation(s).
NOTE : Automated Backups option will not be available to you if your admin has disabled Backups/Restore on the server.
NOTE : Automated Backups might consume space on your account so please choose the Backup Rotation as per the space available.
We will be taking an example of WordPress which is a popular blogging software. We will be choosing the Frequency of backing up once a day.
For New Installations
1) Login to Panel
- Go to your panel (e.g. cPanel’s url will be https://domain.com:2083) and login with your details.
- There click on the Softaculous Icon or Link.
- The Softaculous Enduser Panel will be displayed.
2) Choose a Script
- On the left side you will find some categories of Scripts.
- Choose the category in which your script lies. We choose Blogs in this case.
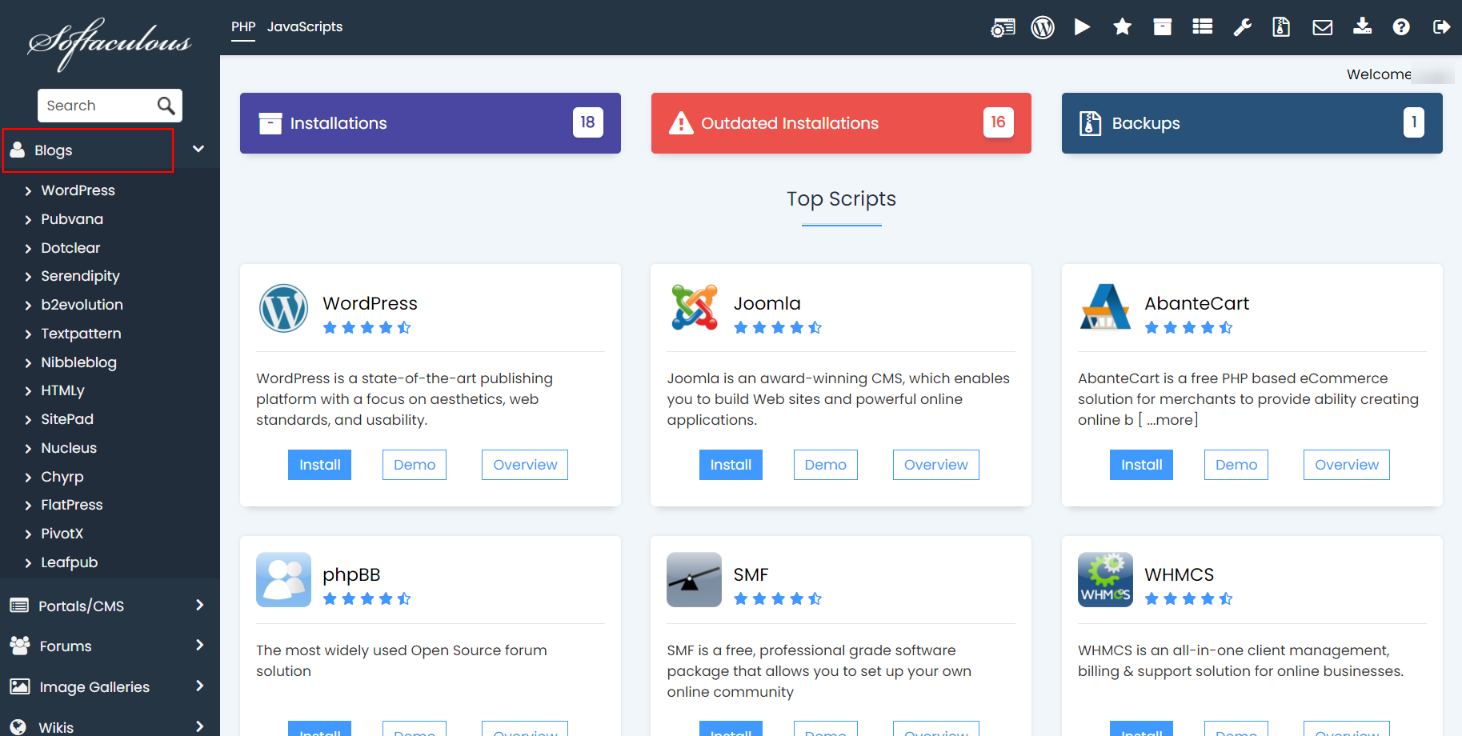
- Choose a script from it. We choose WordPress in this case.
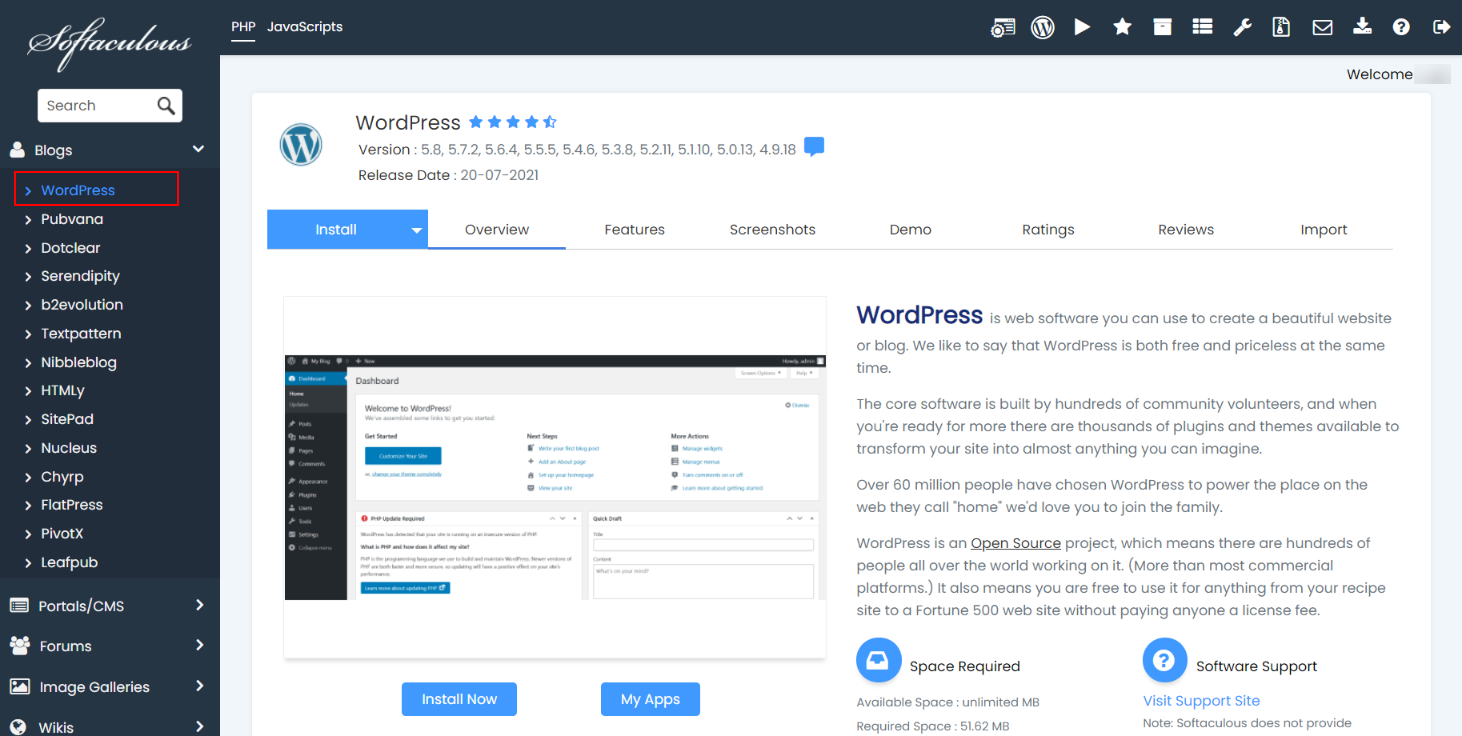
The Script details will appear with various details like ratings, reviews, demo url etc.
3) Fill in the Installation Details
- Click on the Install Tab.
- Fill in the details.
4) Choose Automated Backup details
- Click on the Advanced Options button.
- Choose the Backup frequency i.e. Once a Day, Once a Week, Once a Month.
- Choose the Backup Rotation. This is the maximum number of automated backups for this installation. If the maximum limit is reached Softaculous will delete the oldest backup of this installation.
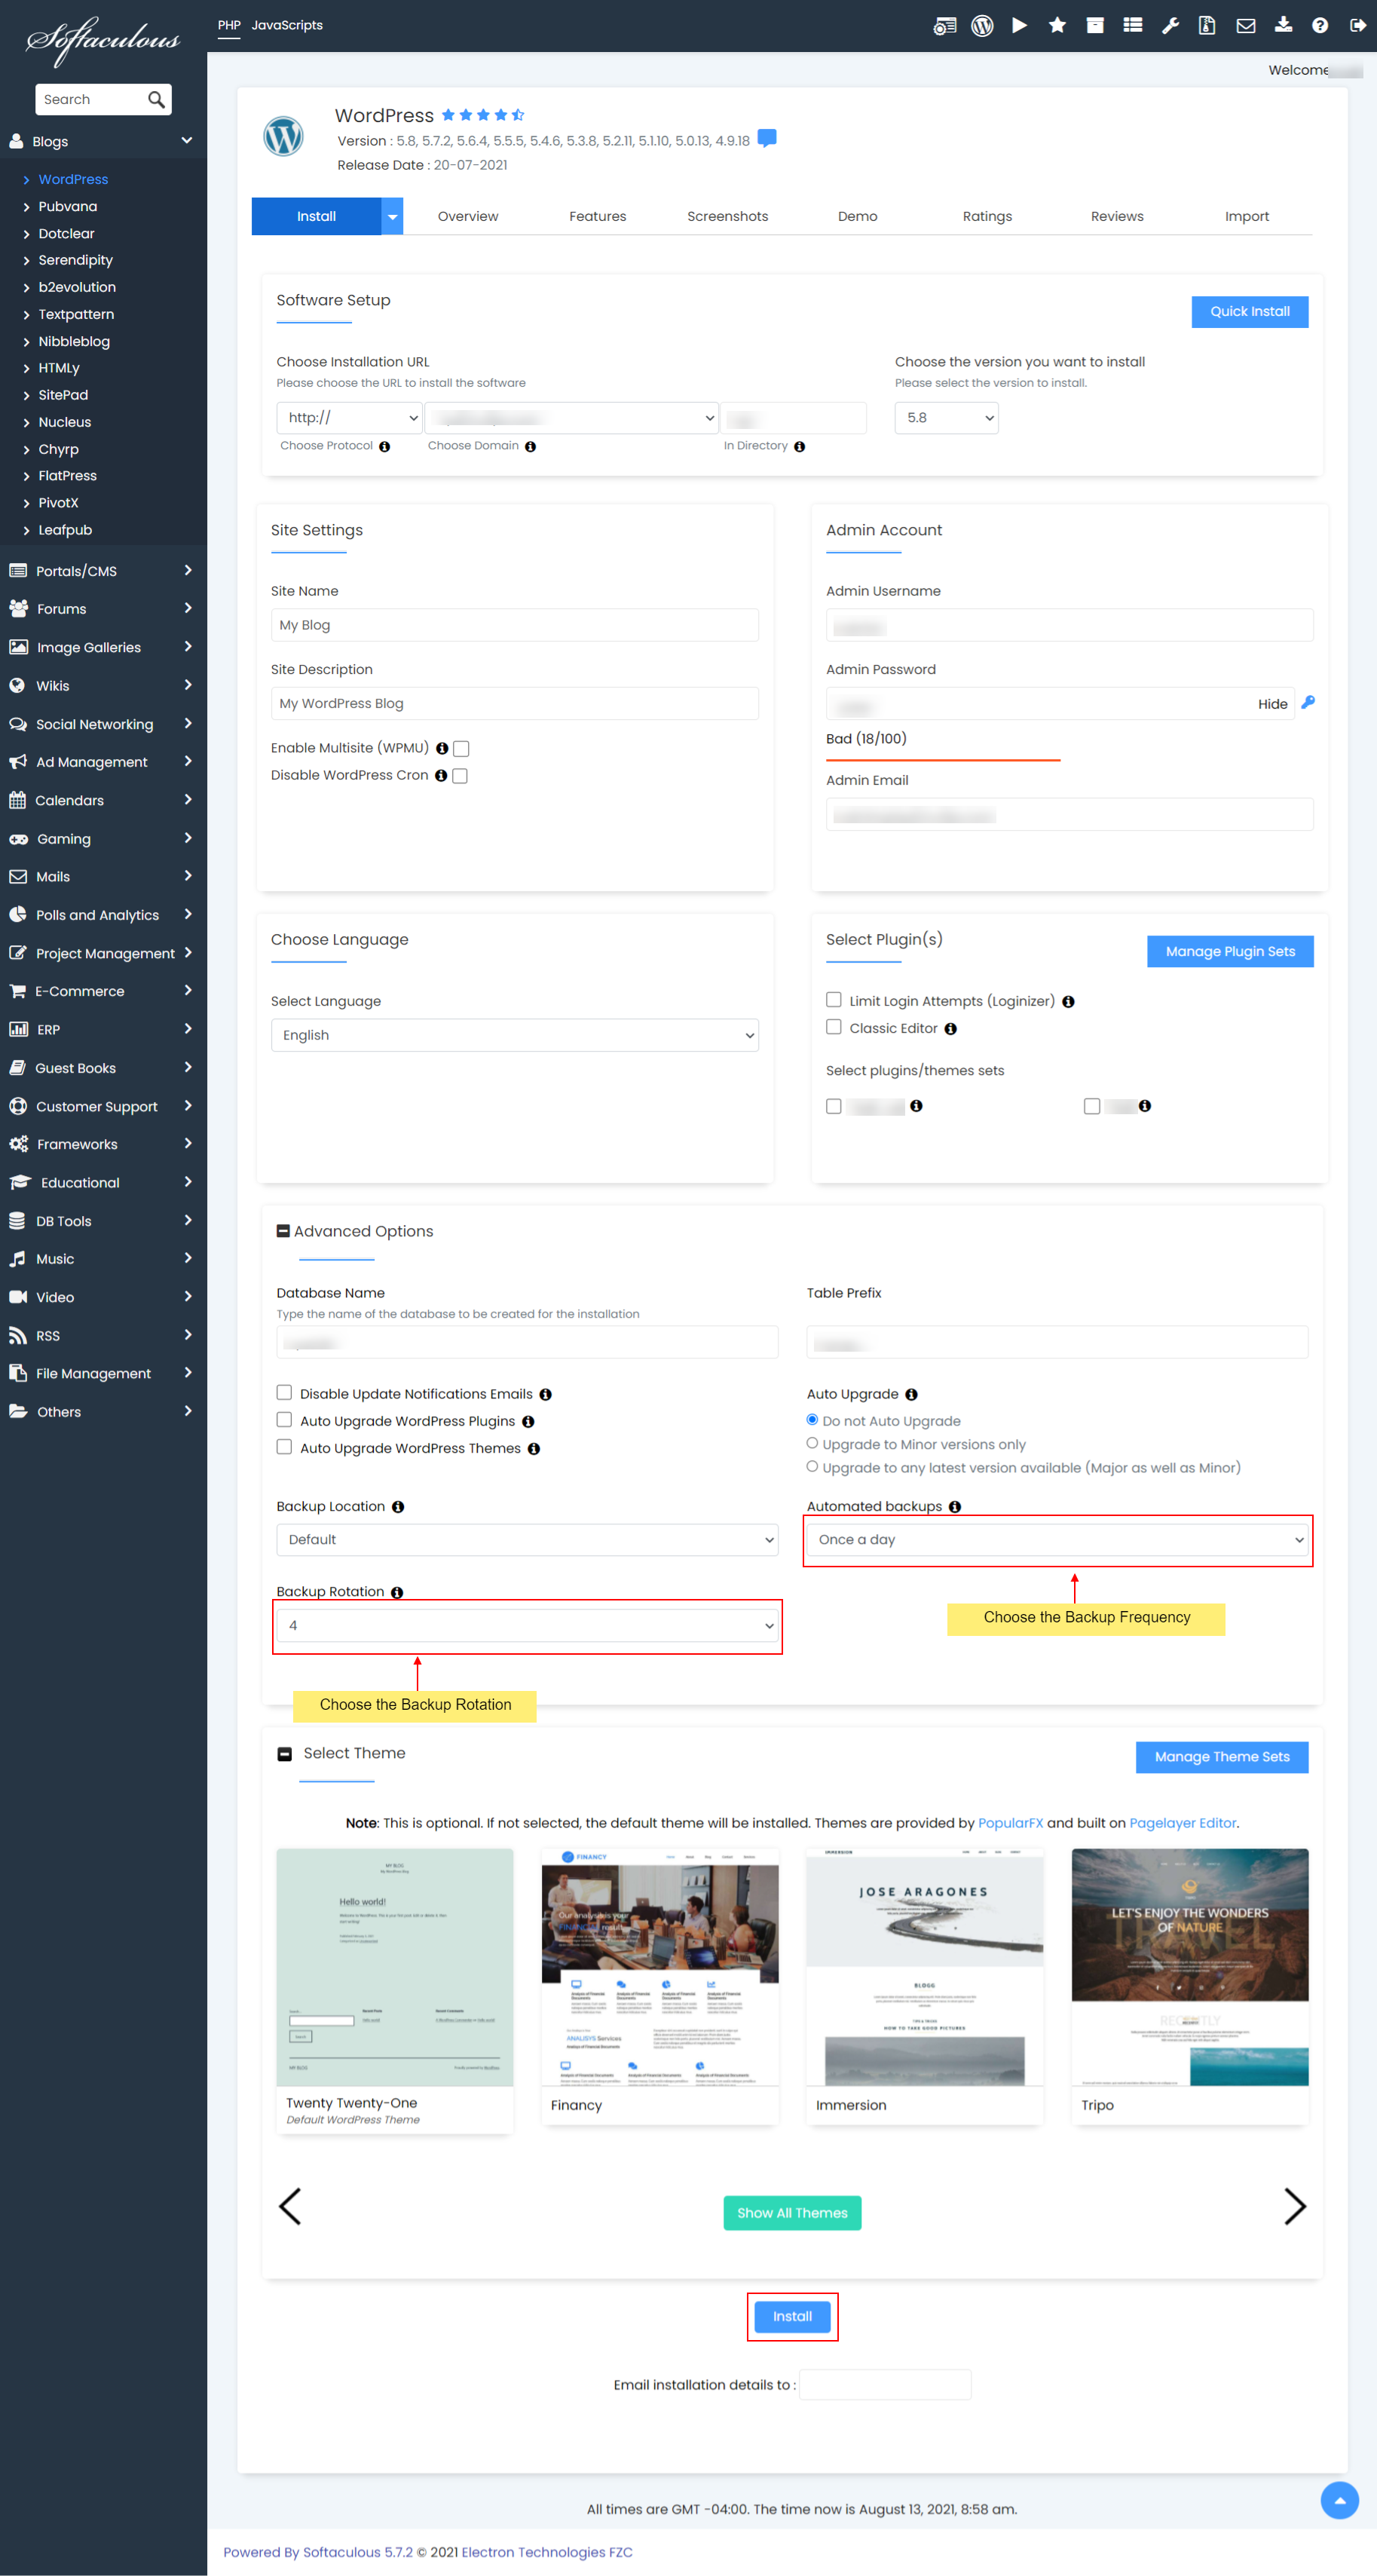
5) Click Install
- Click on install and this should do the trick. Installation time may vary in accordance to size of the script and other factors, So please be patient.
- That’s it !! Your automated backups are now scheduled and will run as per the frequency you have chosen. You will receive the details of Automated backups when the backups are executed.
NOTE : You will receive the emails if the emails are enabled.
For Existing Installations
1) Login to Panel
- Go to your panel (e.g. cPanel’s url will be https://domain.com:2083) and login with your details.
- There click on the Softaculous Icon or Link.
- The Softaculous Enduser Panel will be displayed.
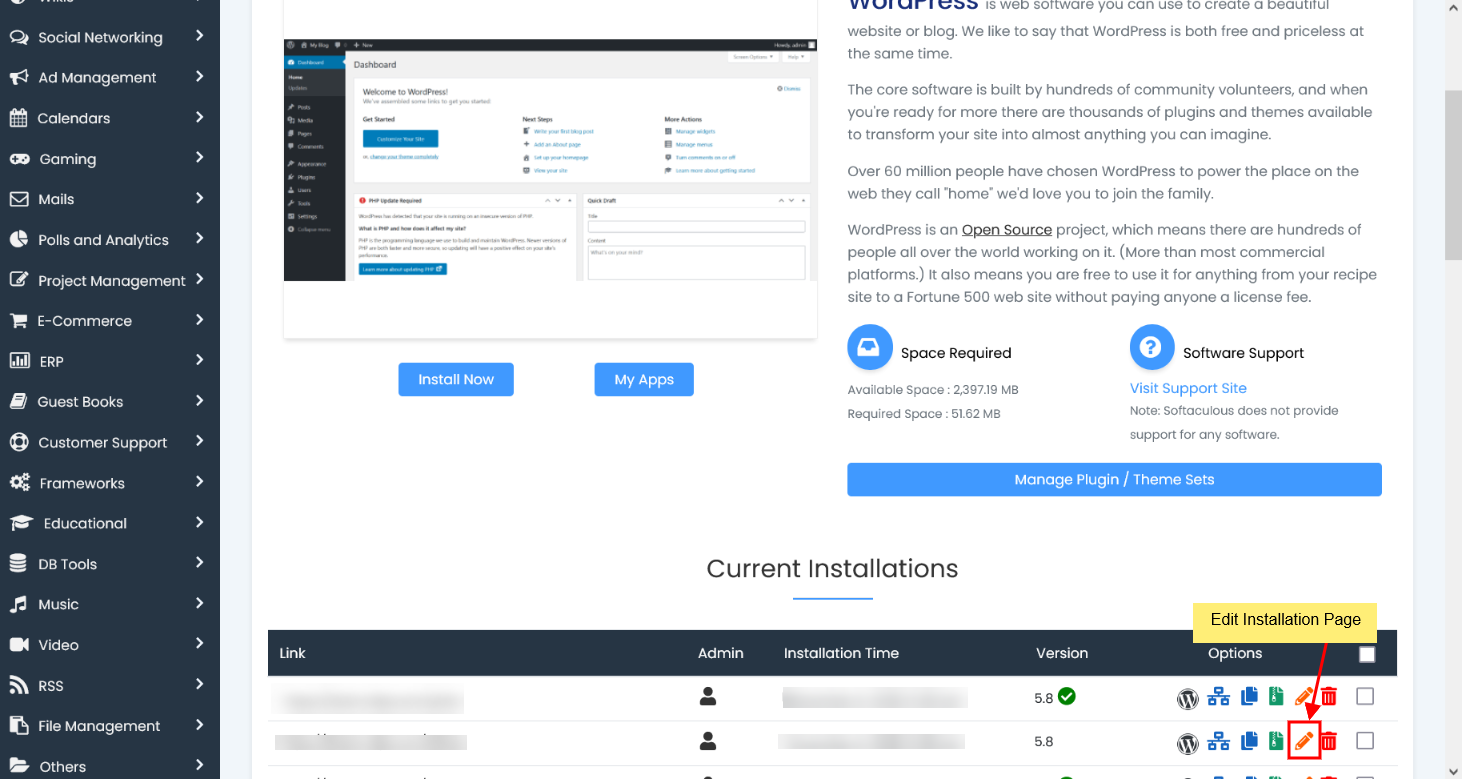
- Now choose the installation you want to enable/edit Automated backups for.
2) Choose the Automate Backups details
- Here you can enable/disable/edit the Automated backups of the installation
- Choose the Backup frequency i.e. Once a Day, Once a Week, Once a Month, choose Don’t Backup if you want to disable automated backups
- Choose the Backup Rotation. This is the maximum number of automated backups for this installation. If the maximum limit is reached Softaculous will delete the oldest backup of this installation.
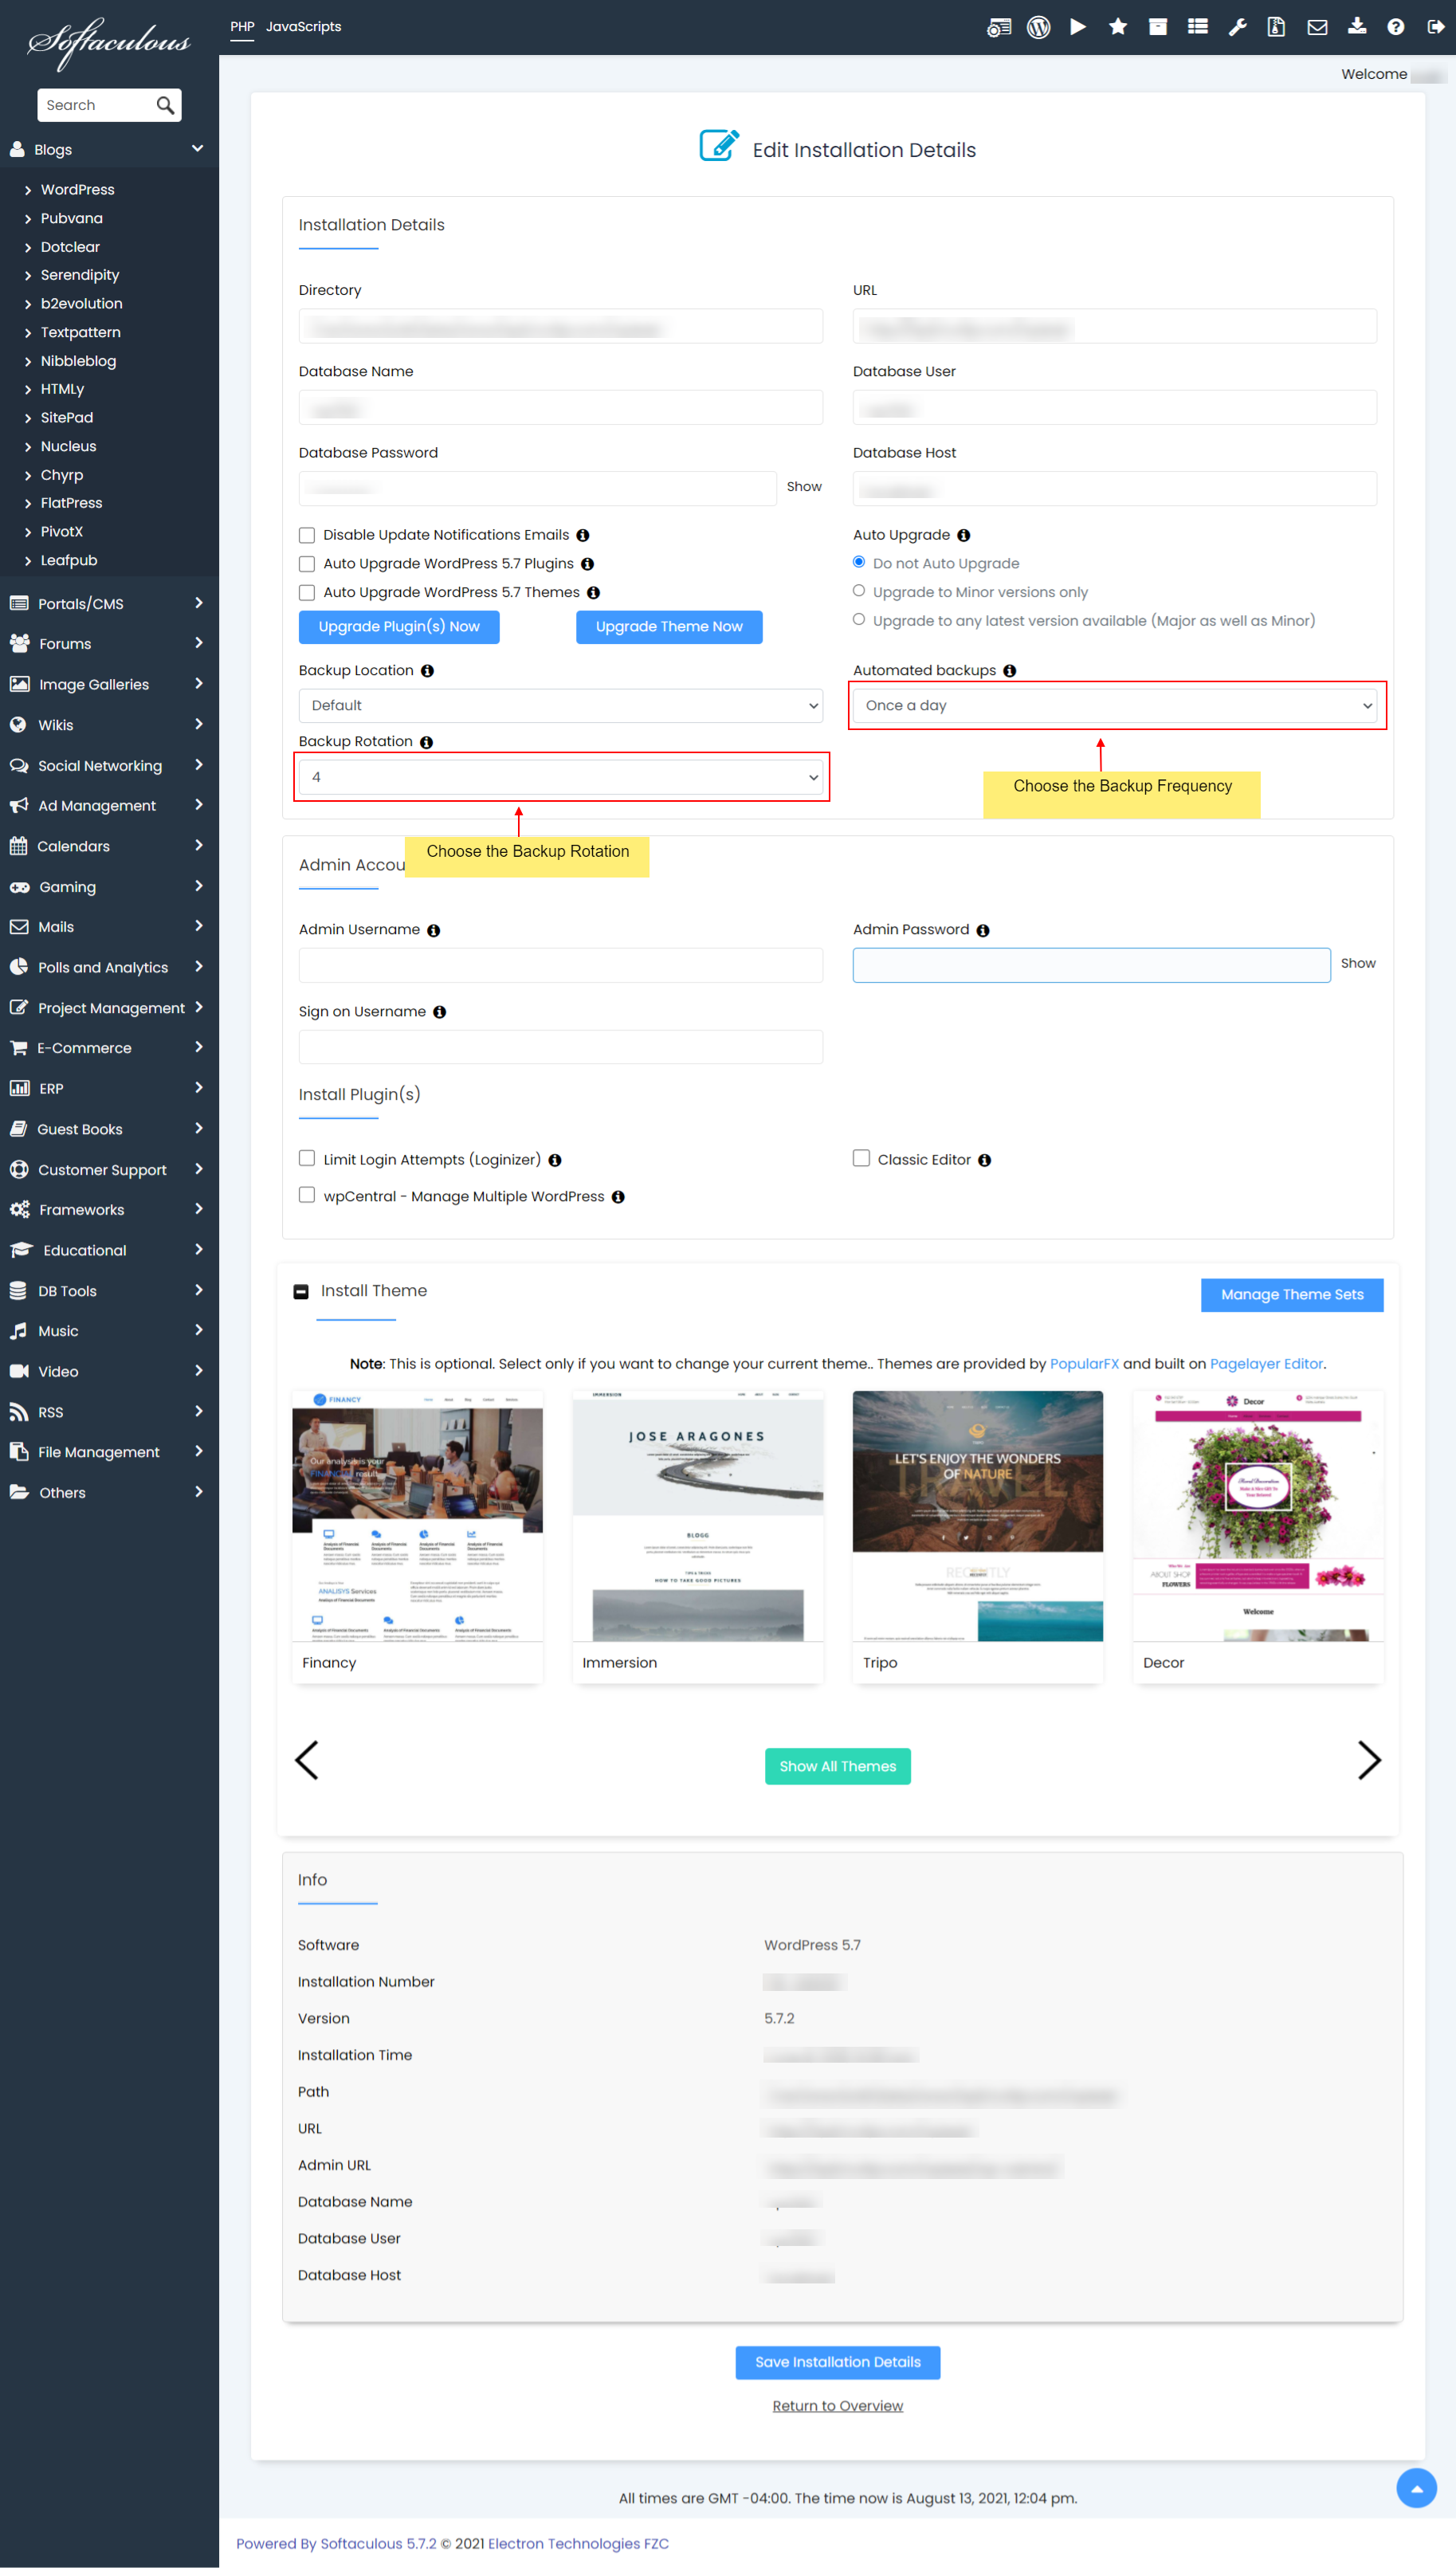
3) Save the details
- Now click on Save Installation Details button to save the installation details.
- That’s it you have now configured the Automated backups for this installation.
For Admins
Disable Automated Backups
- Automated backups can be disabled by admins from Softaculous Admin panel -> Settings
- Select the Disable Automated Backups for Enduser check box and click on Edit Settings button.
- That’s it !! Automated Backups are now disabled for Endusers.
Note : Regular backups will still be enabled for the users only Automated backups will be disabled with this setting. If you want to completely disable backups/restore select the Disable Backup/Restore Function for Endusers check box.

